Customization of the operation area
Settings for the operation area will effect the user friendliness of aeroTAP operation. For example when you shrink the operation area, you can move around the screen by smaller move of the palm. But in some cases, it may become to sensitive and you won't be able to select small buttons.
Adjusting the size of this operation area according to the content will make the production more effective.
a) When running with Nearest Object Tracking mode, expanding the area to all camera view will improve sensitivity of pointing.
b) When using a portrait monitor, expanding the area in the vertical direction will help reduce the inconvenience of pointing (selecting).
*For portrait mode monitors, you may need to make the long side of the Touchless area shorter (see "Settings for touchless operation area" for more information).
You may not be able to point areas, if you move the operation area to the top left or bottom right.
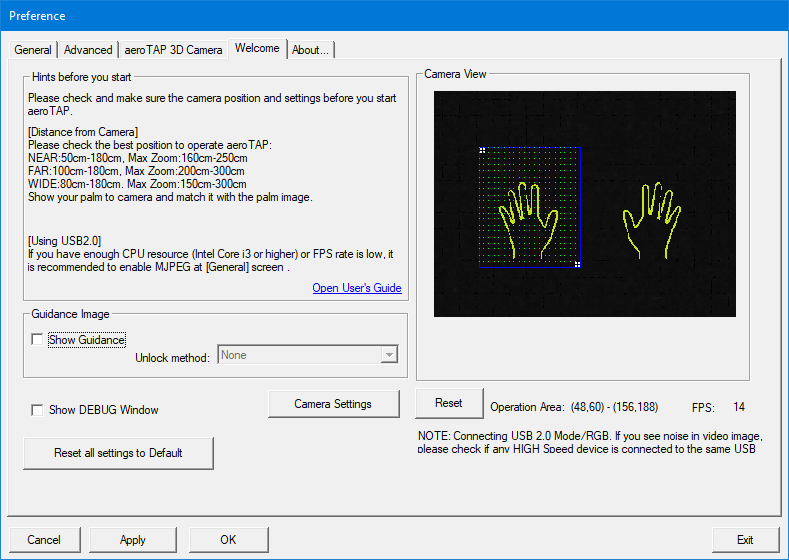
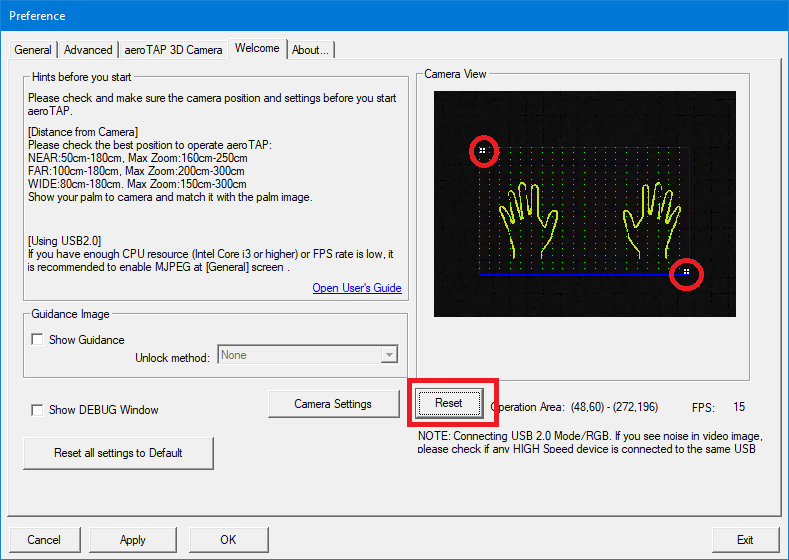
Operation Area
Your current Operation Area is shown by a blue rectangle in Camera View of Welcome Tab. You can adjust the position of the operation area, by dragging the inside the blue frame.
In addition, you can adjust the area size by dragging Left-top and Right-Bottom Icon  .
.
Click the Reset button to restore to the default settings.
Modify the area smaller in the horizontal direction
For example you can limit the operation area to the center of the camera view. This is useful with contents that make an action simply by just detecting the palm (Stop with Click mode).