Tutorial: Utilize Show Guidance feature
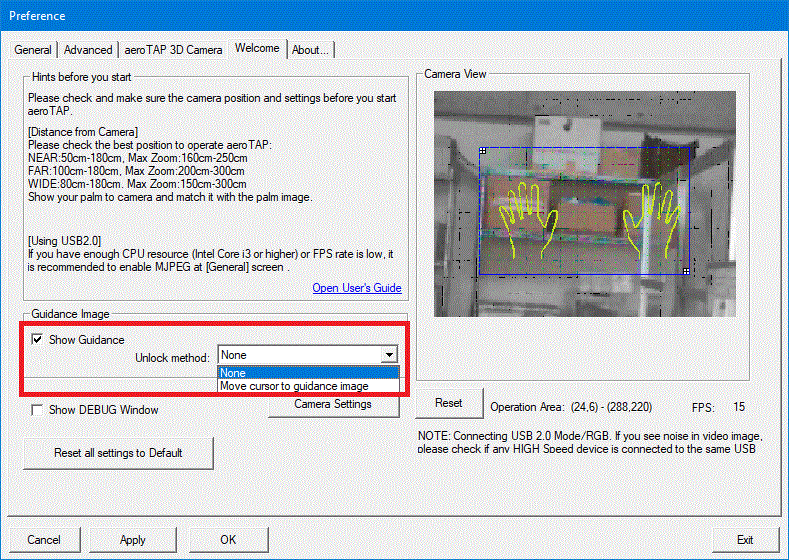
When you activate Show Guidance option in the Welcome tab of Preferences, if there is an operator in front of the camera that is not performing any operation, the guidance image can be shown.
For example, you can show messages such as "Please show your palm towards that camera" or "Stand on the mark below and raise your hand towards the camera".
For more information about customization of guidance image, go to
Modify Guidance Image.
Display style of the Guidance
You can modify the display style and the display position on the Guidance by generating SplashGuide.ini file in the same folder as the bmp.
Style = 0 float, Style = 1 fixed
Trans = 0 - 255 value of transparency (255: opaque)
Example: Content of SplashGuide.ini
x = 100
y = 200
Style =1
Trans=255
Result: Guidance image will be displayed at coordinate (100,200) as a static image. The center position of the guidance image is defined by the x, y values.
Assigning x,y and style can be skipped (omitted).
Default Settings (omitted):
x = horizontal center position
y = vertical center position
style = 0
trans =180
Coordinates omitted: You can skip assigning coordinates X and Y. When set as the following example, coordinate X = 500 and y= center of Y within the screen will be assigned.
x = 500
style = 0
trans =180
Condition to show/hide Guidance
To show/hide the Guidance will change in the following conditions.
| Camera detection |
Guidance image |
No operator detected for more than 10seconds
|
Not displayed |
| A person detected |
displayed |
| Start operation (virtual cursor is displayed) |
Not displayed |
| Stop operation (virtual cursor is not displayed) |
displayed |
Additional information: You can only change guidance image with Professional version.
Hint: Prepare a image file SplashGuide.bmp in the folder where aeroTAP.exe is located. You can freely change the Guidance image (only for Professinal version).
Show Guidance and Lock/Unlock operation
When you enable the Show Guidance feature, you can also activate the Unlock method option. When the operation is locked, you can prevent unwanted touchless operations.
This is also useful for beginners to understand and get use to the touchless operation.
When the operation is locked, you can only move the virtual cursor because selections such as click actions are disabled.
You can unlock in the following way:
| Unlock method |
What to do |
| Move cursor to guidance image |
The operator can unlock by moving the virtual cursor near the center of the Guidance image. When unlocked, the guidance image will disappear.
When the guidance is show again, operation will also be locked. |
|
|
、


