aeroTAP Touchless Interface performs the touchless operation by detecting and tracking the palm. To get the best performance, please check and consider the following three key factors.
Lighting This is important because the palm detection is performed by using images from the camera. For this reason, sufficient brightness, 100lux or more, is required. Even when the lighting is sufficient, if there is a strong contrast due to strong light from behind the operator, the palm detection capability will drop.
Please consider the environment including lighting beforehand.
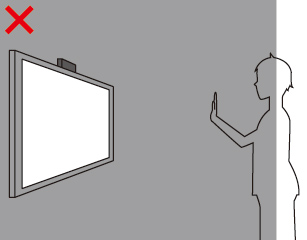
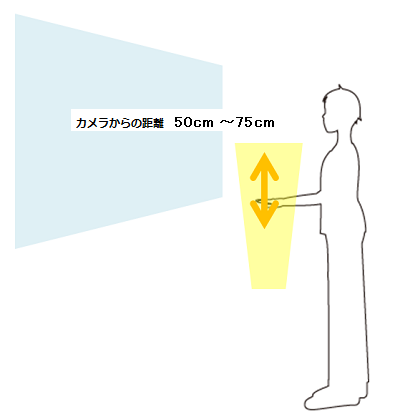
Distance The distance from the camera to the palm is also an important element. If the palm is too close (under 40 cm), the whole palm will not fit inside the camera view and palm detection can not be done. On the other hand, if the palm to too far and too small, it will be difficult to detect.
The appropriate distance from the camera and the palm/hand set by default is 70cm to 180cm. You can check the distance using the Palm marker shown on the feedback screen. When your palm/hand is about the same size of it, that is the appropriate distance.
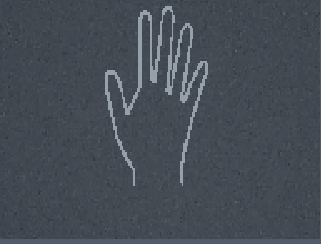
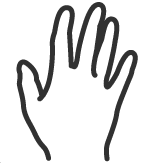
Angle Finally, for the camera to recognize the shape as a palm, you need to raise your palm (all fingers need to be visible) in front of the camera. If you raise your hand at an angle that hides your finger in some way, the camera will not be able to recognize it as a hand. For example, when you set the camera facing down from a high position, the operator may not be able to keep the palm in an appropriate angle. Set the camera as level (horizontal) as possible.
The best angle for the camera and the palm is within 50 degrees.
Administrative right is required to run aeroTAP. To run the version without administrative rights, use aeroTAPna.exe which you can find in the folder where aeroTAP is installed.
Notes: Please contact the administrator when you cannot connect the camera due to security reasons.
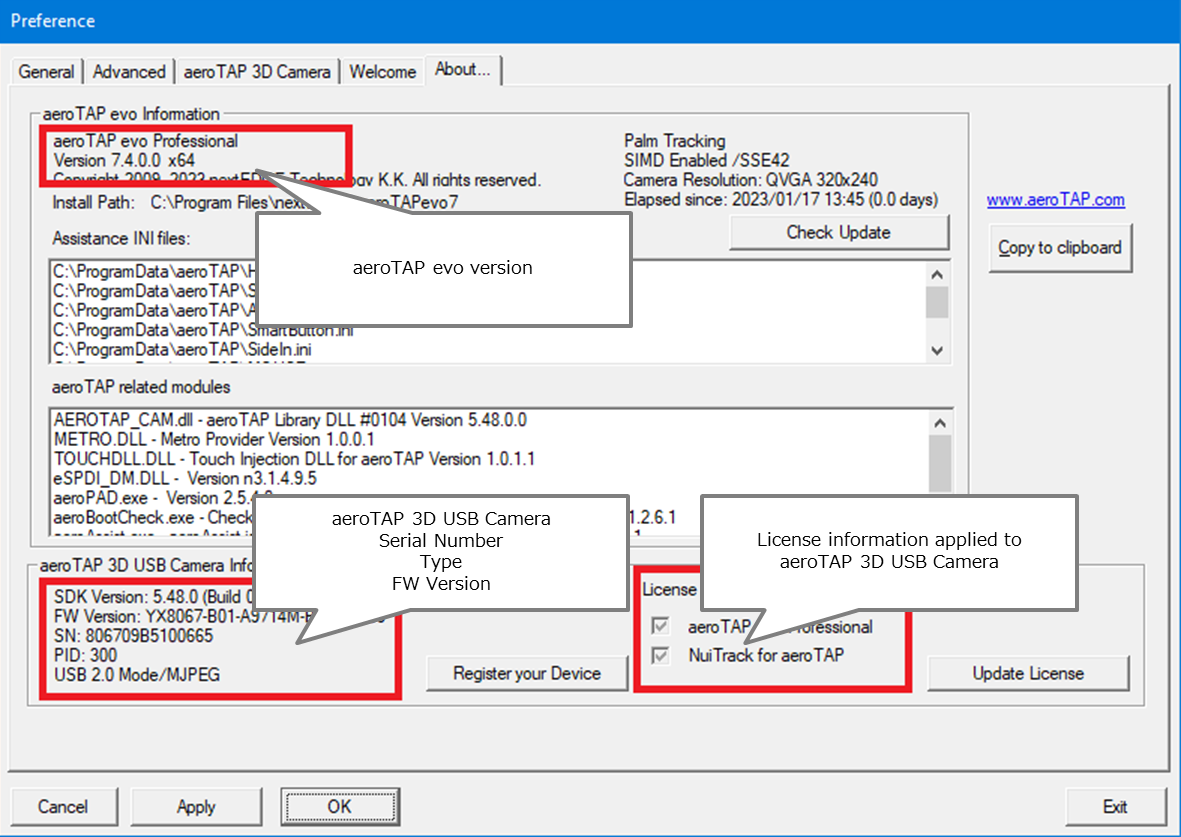
Version information
We recommend that you check if you are using the latest software version on a regular basis.
To check your software version and the serial number for the aeroTAP 3D USB camera, use the About tab in Settings.
Please include this information when you contact us.
Additional information: *Professional license will be granted and attached to the aeroTAP 3D USB camera.
License update
*License will be granted and attached to the aeroTAP 3D USB camera. The following steps are show how to register your license after purchasing.
Register user and device
Purchase/request a license
Notification of a successful process
Update with the License Update button in the About tab
Reboot aeroTAP evo and check that the license is granted
Additional information: License update procedure requires Internet connection.
User registration
Please join us as a member of the aeroTAP project (user registration). User registration is required to download SDK and manage your license.
Also, register your aeroTAP 3D USB camera. When you register your camera, have your serial number ready.
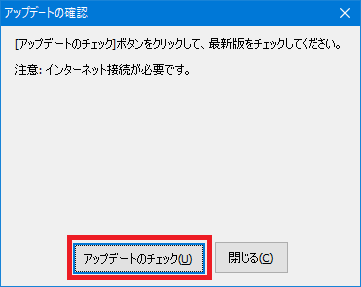
It is highly recommended to check whether an update is available. Please check on a regular basis for the latest version.
You can check for the latest version from the Check Updates button in the About tab of the Settings.
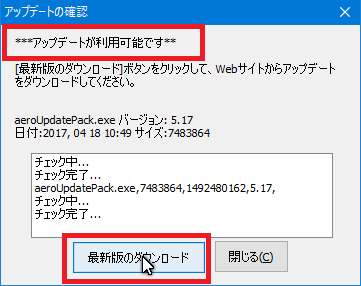
When an update is available, click the Download latest version button. When the Website is displayed, download the update tool and apply the update.
Important: This function requires an Internet connection. Important: Please contact us beforehand to change to the Professional version.
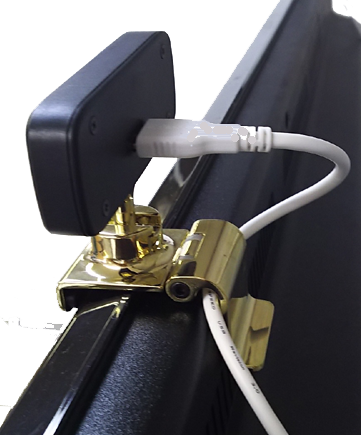
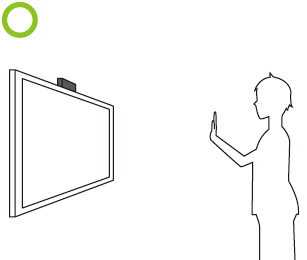
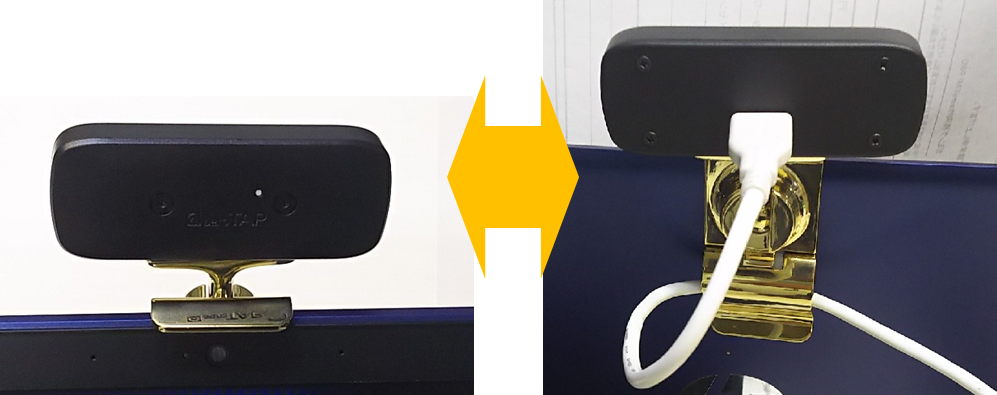
Camera installation
aeroTAP 3D USB camera is designed to set in several different usage environments. Here, we introduce some basic examples.
For desktop and large monitors,
set the camera as shown in the picture on the right.
For laptops and small (thin) monitors,
set the camera as shown in the picture on the right.
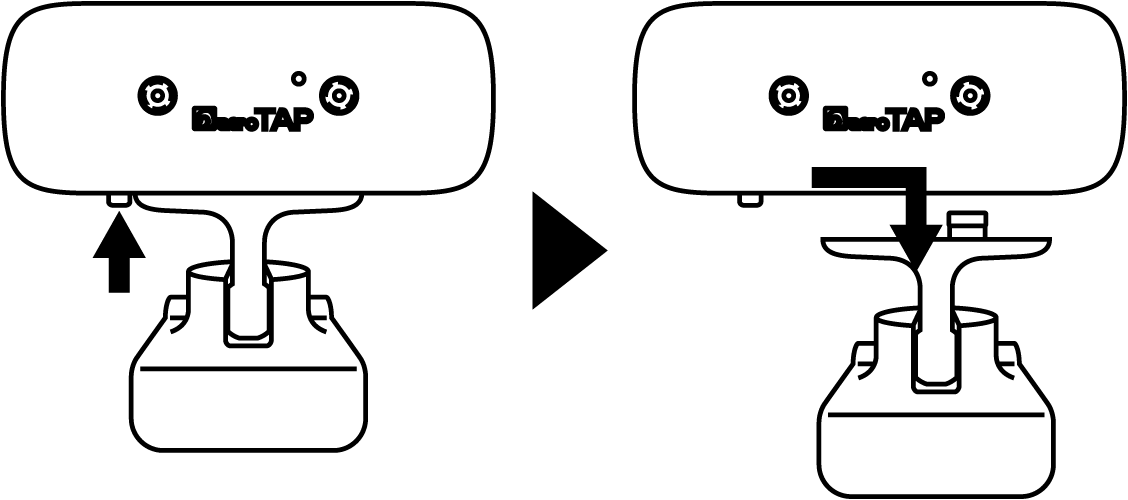
Disassemble the camera base
You can remove the camera head from the camera base. Slide the camera head while pressing the button on the bottom of the camera head.
Hint: A screw hole for tripods will appear when you remove the camera head from the camera base.
Camera orientation (Rotation)
You can also rotate aeroTAP 3D USB camera and use it with an up-side-down position or a portrait position. To set the camera up-side-down, select Up-side-down option in the Preference screen.
Important: This will not function when you use Virtual Touch Screen mode.
Position for operation
Each time you start aeroTAP, please check the following on the position of operation which you will find in the Welcome screen.
Check the camera recognition of the operator and the camera angle
aeroTAP operation is based on the processing of camera images, so you CAN NOT operate if the camera can not recognize the operator. Also you CAN NOT operate in environments which are extremely dark or against light (sun).
Please adjust the brightness and angle before you operate.
Check the distance (display size) of the operator
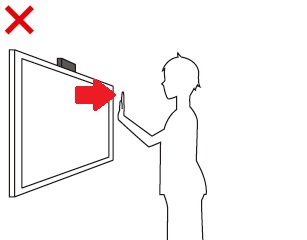
If the distance is too close, even a small move of the palm will react in a large way making it hard for precise and fine controls. On the other hand, if you are too far from the camera, the palm of your hand will be too small for the camera to detect.
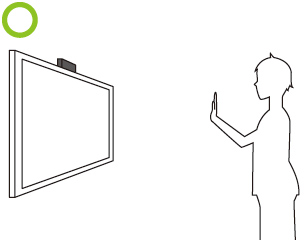
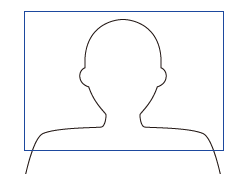
The appropriate size is when your shoulders and above are displayed.
Your position (distance) is good when your palm fits the palm indicator in the Welcome screen.
Distance between the camera after launching aeroTAP
After you launch aeroTAP, a feedback screen will be displayed on the top center. When the palm shape is about the same size as your palm, that is the position with the recommended distance from the camera. The appropriate distance differs according to the camera and/or the zoom setting you use. When you first run aeroTAP evo, check the appropriate distance using the feedback screen.
Important: When operation is made too close to the camera, a red frame will be displayed in the feedback screen.When this warning is displayed, click operation will not function.
Checking the distance range
When the distance filter is activated, the distance from the camera will be limited. Please adjust the distance filter according to the operation position.
Hint: You can adjust the distance filter and the zoom settings at aeroTAP 3D camera tab of the Preference screen. Hint: When the operator (palm) is too close, feedback image will become red as a warning.
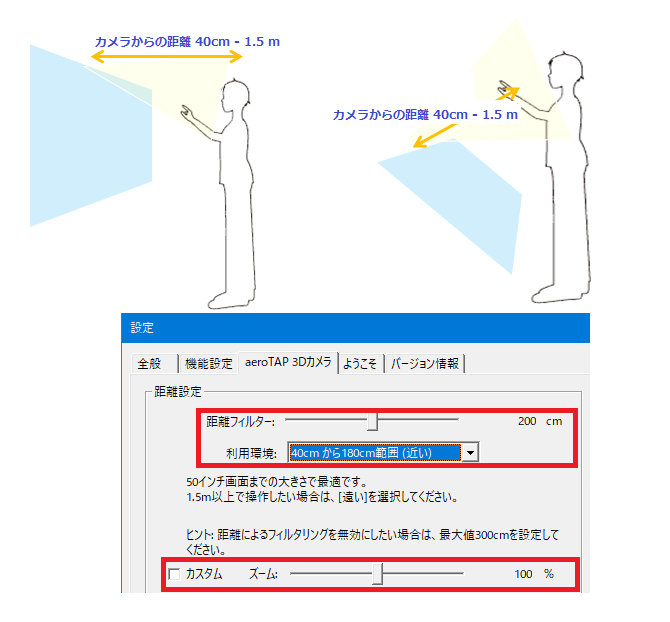
About setting distance
If you are using the aeroTAP 3D USB camera, you can adjust the distance from the camera to the palm of the hand up to 2.5m. You can adjust Distance filter, Environment, and Zoom option in the aeroTAP 3D camera tab.
The standard settings may be adjusted as shown below. The distance for operation will normally be subject to the size of the display. For example, with a small display you will operate from a closer distance and with a large display you will operate from a more distance position.
When using as a digital signage which will be used by the general public, please adjust the operation position according to the screen size. For a more intuitive operation, set the standing position to where the action of the operator and the virtual cursor's move will correspond.
Please adjust the zoom settings, touchless operation area with Customization of operation area.
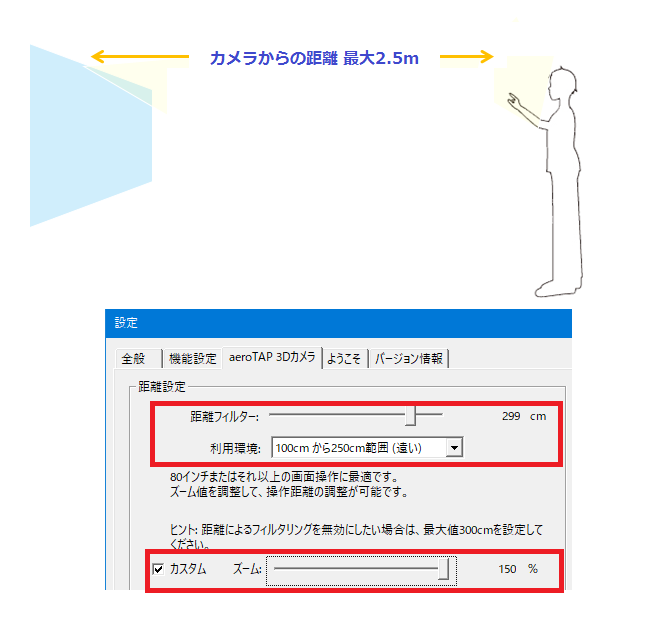
Configuring the maximum camera distance when the depth filter is enabled:
The settings as you can see below will be the maximum distance from the camera.
Head-up mode
In Head-up mode, set the camera facing up. Moving your palm up/down will move the cursor up/down and the same with right/left.
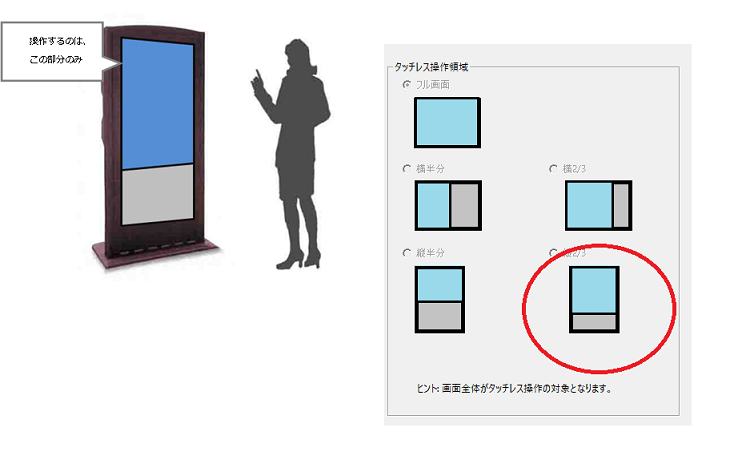
According to the usage and the monitor you use, you can restrict the area for touchless operations. For example, for a portrait display shown below, you can limit the area for touchless operation to the upper part of the display and show advertisements on the bottom. For more information, please see Touchless operation area in the Settings tab.
You can also define the touchless area using the command line parameters. For more information, see Command Parameter page.
Tracking (detection) Mode
You can now choose the detection mode not only from palm detection but also Nearest object detection mode.
Nearest object mode is effective for users without experience of operating touchlessly for example digital signages.
In this mode, detection and tracking will be done using the distance data from the 3D sensor. For this reason, this mode cannot be used where there are obstacles or a strong light source that will make it hard to acquire distance data.
Hint: Nearest Object Tracking mode can be performed approximately 80cm from the camera.
Important: It is hard to make precise operations in Nearest Object Tracking mode. This mode is more useful for big buttons or pictures.
Tracking (detection) Mode
Description
Palm Tracking (Default)
Detects/tracks the palm regardless of the surrounding obstacles.
Nearest Object Tracking
Only tracks nearest object.
Creates a simple Virtual Touch Screen To perform nearest object tracking, please activate distance filter.
Virtual Touch Screen
When using Virtual Touch Screen Mode, you need to set a virtual touch screen for the display, in the space above or in front of the display, using a special calibration tool.
This feature is designed for integration.
About Click Operations
Depending on the content you operate,you can select a intuitive action(method) for clicks. With aeroTAP,you can configure the method for each application.
For details, see Recognition of Click actions.
Click Operation
Method
Description
0: No action
Click action will not be performed. The user can only move the cursor.
1: Click when stopped
Click action will be performed when the virtual cursor stops. You can set the time interval to detect the stop of your palm.
2: Smart Click
Step 1: Click action will be performed when you stop your palm on a clickable area and the center of the virtual cursor stops at the center.
When a clickable area is detected, the color of the virtual cursor will change from GREY to RED. In other areas, click will not be executed even if you stop.
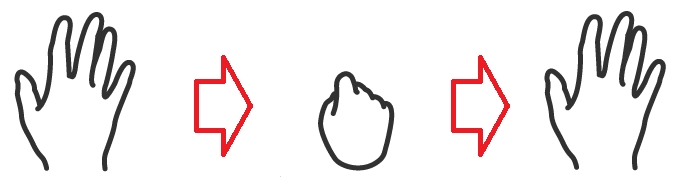
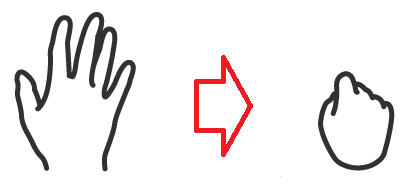
3: Grab to Click
In this mode, the click action will be performed when you grip your hand (like grabbing something).
Step 1: Stop your palm at a clickable area. Then the center of the virtual cursor will also stop at the center and will be locked. Step 2:Grip (grab) your hand and quickly open Just gripping will perform the click action but when you quickly open it back, you can keep the position of the cursor.
Hint: For an accurate click operation, perform the grab action (grip your hand) after the virtual cursor stops on the target position.
4: Drag and Drop
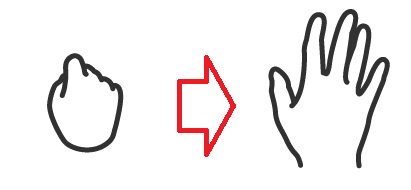
In this mode, click action will be performed by gripping you hand, dragging with your hands kept gripped, and then opening it at the desired position. Follow these steps to perform Drag and Drop operation.
Step 1: Stop your palm at a clickable area. Then the center of the virtual cursor will also stop at the center and will be locked. Step 2: When you grip your hand, the drag action will start and the shape of the virtual cursor will change.
The shape of the virtual cursor during the drag action:
Step 3: Move (drag) your fist and open it at the position you want to make the drop action.
Hint: For an accurate click operation, perform the grab action (grip your hand) after the virtual cursor stops on the target position.
5: Push to Click
In this mode, click action will be performed when you move your palm closer to the camera about 10cm (pushing to the front).
Step 1: Stop your palm at a clickable area. Then the center of the virtual cursor will also stop at the center and will be locked.
Step 2: Click action will be performed when you make a pushing action (about 10cm towards the camera).
Hint: For an accurate click operation, perform the grab action (grip your hand) after the virtual cursor stops on the target position.
Other clicking mode
Other clicking modes are available. Please check the feature page for more information.
This enables a simpler operation when using with digital signage, KIOSK devices.
The color and shape of the virtual cursor
The shape, color and size of the virtual cursor indicates the condition of the detected palm and the position of the cursor.
Important: When you use aeroTAP 3D USB camera, the cursor size will change according to the change in the distance (from the camera) that was first detected.
Virtual Cursor
Description
The normal color and shape of the virtual cursor
Clickable
The cursor will change to this color when it hovers on a button or a link you can click.
When Smart Click is selected,
click action will be operated only when you stop on a clickable area.
The cursor will change to this color when the palm is on a clickable area with Grab to Click or Stop to Click mode.
Drag action or both hand mode
The cursor will change to this style while dragging with Drag and drop mode.
This style will also be displayed when you are operating with both hands.
Virtual Cursor Moving Styles
Center image of virtual cursor indicates whether the hand has stopped or if it's still moving. If you want to click a small button, please it provides better accuracy when do click action after make sure center image indicates 'Stop'.
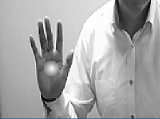
Change of Feedback
The color of the palm indicator displayed in the feedback will change according to the following situation. Settings for feedback display can be adjusted in the General tab. You can display the feedback at any desired position and transparency or even hide it.
You can check the current settings of the Click mode and Side-In gesture with the feedback window.
Feedback
Description
GRAY
When No action, Stop to Click or Smart Click is active, the color of the cursor in feedback image will be GRAY.
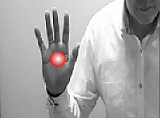
RED
When a mode other than Drag and Drop mode is active, the color of the cursor in feedback image will be RED.
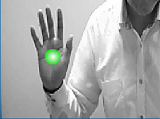
GREEN
When Drag and Drop mode is active, the color of the cursor in feedback image will be GREEN.
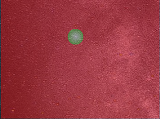
Showing RED color
Hand is too close
The left image is a feedback image when the hand is too close with Drag and Drop mode.
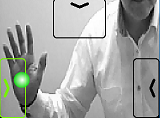
Navigation for
Side-In Gestures
If Side In Gesture is enabled and you move your palm to the Side-In gesture detection area (middle-top, bottom-left or bottom-right of the operation area), Navigation image for Side-In gesture will appear in the feedback image.
By moving the virtual cursor out of the operation area and then moving back in, Side-In gesture will be detected.
For details, see Side-In Gesture page.
Important: Side-In navigation will not be displayed when feedback window is in full screen mode.